
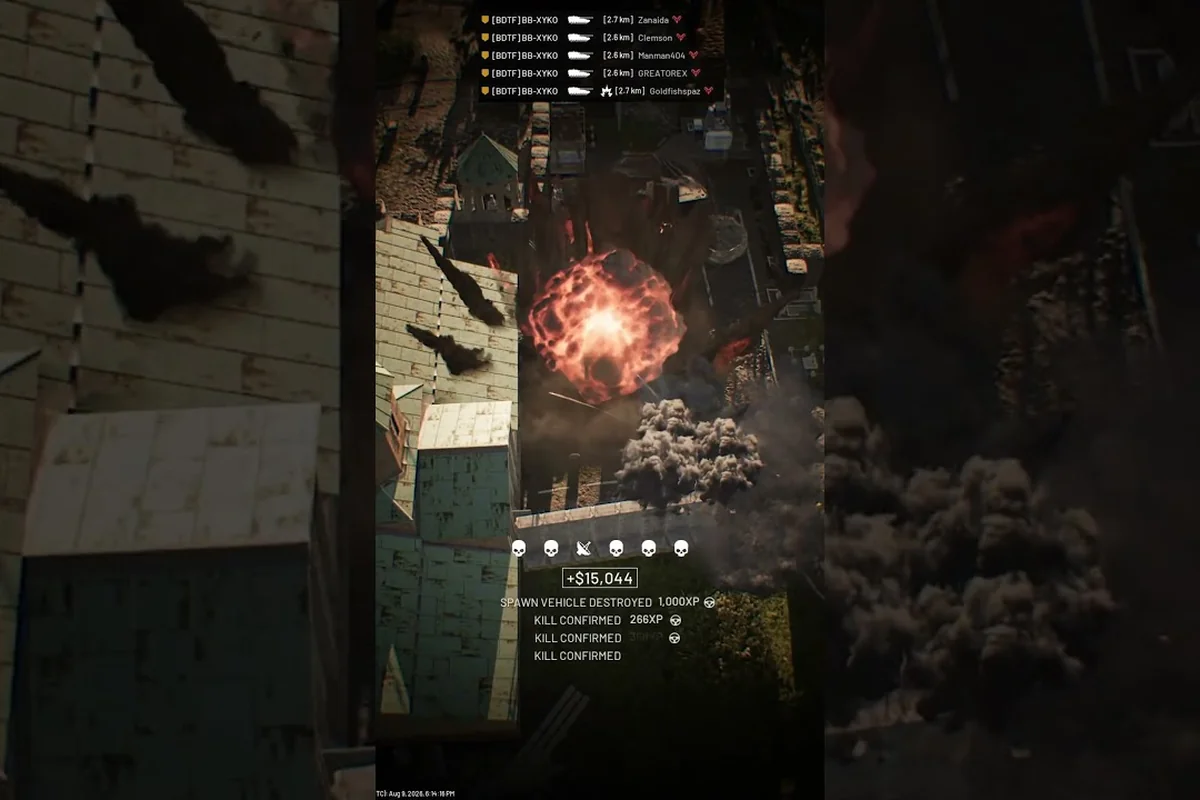
Every WARDOGS demolition guide worth its salt starts with one hard truth: a fortified enemy position will bleed your squad dry unless you bring the right tools and a coordinated plan. Because the game's persistent economy means every death costs real cash, learning how to breach buildings efficiently isn't just a tactical nicety — it's the difference between maintaining a healthy bankroll and watching your war fund evaporate. This WARDOGS breaching guide breaks down the explosive arsenal, the mechanics behind structural damage, and the teamplay patterns that turn a chaotic push into a surgical strike.
Understanding Structural Damage in WARDOGS Siege Warfare
The foundation of any WARDOGS demolition guide is understanding how the game models structural integrity. Unlike traditional shooters where walls are either solid or gone, WARDOGS treats defensive structures as a resource with distinct damage thresholds. According to the official WARDOGS Steam page, the game emphasizes a 100-player sandbox where fortification plays a central role, which means demolition tools are balanced around that scale.
When you engage in WARDOGS siege warfare, every structure you encounter has a structural health pool that determines how much punishment it absorbs before collapsing. Sandbags, for instance, offer excellent cover against small arms but crumble quickly under sustained explosive fire. Reinforced wood panels sit a tier higher, while metal plating represents the top end of player-built defenses — though it comes with a hefty material cost that impacts your team's overall WARDOGS building strategy.
The damage model rewards precision over spray-and-pray tactics. A rocket that impacts dead-center on a wall segment deals full damage to that section, while a glancing hit might only strip the outer layer. This matters because breaching isn't just about destroying everything — it's about creating specific entry points that funnel defenders into kill zones. Players who treat demolition as a blunt instrument waste ammunition and expose themselves to counter-fire, while those who study the damage model can crack a base open with surgical efficiency.
Explosive Types and Their Structural Damage Values
| Explosive Tool | Base Damage | Effective Range | Best Use Case | Cost |
|---|---|---|---|---|
| Frag Grenade | 120 | 8m | Softening infantry, damaging sandbags | $400 |
| RPG Rocket | 450 | 50m | Primary wall breaching, vehicle threats | $1,200 |
| C4 Charge | 600 | 3m (placement) | Precision demolition, multi-charge sync | $900 |
| Anti-Tank Mine | 500 | 0m (trigger) | Defensive denial, ambush setups | $750 |
| Mortar Strike | 800 | 150m+ | Area saturation, FOB destruction | $2,000 |
This WARDOGS breaching guide data comes from community testing reports, so exact numbers may shift with patches — but the relative hierarchy holds. The RPG rocket is your workhorse for most breaching scenarios because it offers the best balance of range, damage, and cost. C4 charges excel when you need to breach multiple adjacent walls simultaneously, especially when coordinated through proximity voice chat. Mortar strikes are expensive but devastating against larger installations, though they require a forward observer to dial in accurate fire.
Building a Demolition Loadout That Works
Your loadout decisions in this WARDOGS demolition guide can make or break an assault before the first shot fires. Because cash persists across matches and teamplay actions generate income, you need to balance upfront explosive investment against your ability to earn it back through revives, objective control, and transport assistance. The game's selfish teamwork design, as described by PCGamesN's WARDOGS impressions, means helping your squad also fills your wallet — so a good demolition kit should enable both.
A standard breaching loadout carries one primary explosive tool, a secondary utility, and enough ammunition to handle multiple structure engagements. The RPG rocket plus frag grenades combo covers most situations, letting you crack walls from distance while clearing rooms with grenades. For close-quarters demolition, swapping the RPG for C4 charges gives you more precise control over breach points, though it forces you into dangerous placement range.
Loadout Comparison Table
| Loadout Type | Primary Tool | Secondary Tool | Strengths | Weaknesses |
|---|---|---|---|---|
| Standoff Breacher | RPG Rocket | Frag Grenades | Safe distance, versatile | Limited ammo, loud |
| Close-Quarters Demo | C4 Charges | Shotgun | Precise breaches, room clearing | High risk, short range |
| Support Demolitionist | Mortar Strike | Ammo Box | Area denial, FOB destruction | Needs observer, slow |
| Hybrid Assault | RPG Rocket | C4 Charges | Flexible, adapts to situations | Expensive, heavy |
The hybrid assault loadout costs more but gives you answers to every defensive structure you might face. Community reports suggest that players running this setup tend to earn their investment back faster because they can participate in objective pushes rather than waiting for perfect breaching opportunities. That said, if you're working with a tight budget, the standoff breacher loadout offers the best cost-to-effectiveness ratio for most WARDOGS siege warfare scenarios.
Coordinated Breaching Tactics for WARDOGS Building Strategy
A lone demolitions expert is a target; a coordinated breaching team is a nightmare for defenders. This section of the WARDOGS demolition guide focuses on the teamplay patterns that turn explosive tools into decisive advantages. Because the game features 100-player three-team matches with dynamic objective zones, your breaching efforts need to align with the broader flow of battle rather than existing in isolation.
The two-wall breach is a fundamental technique: two demolition specialists target adjacent wall segments simultaneously, creating a wide entry point that defenders can't cover with a single sightline. This works best when coordinated through proximity voice chat, with a countdown ensuring both explosives land within a second of each other. Defenders expecting a single breach point find themselves caught in a crossfire as attackers pour through both openings.
Step-by-Step Breach Coordination
-
Step 1: Reconnaissance — Identify the defensive structure layout and locate the weakest wall segments. Look for sandbag-heavy sections that will collapse faster than reinforced metal.
-
Step 2: Positioning — Move your demolition team into cover within effective range of the target. Avoid clustering, since a single well-placed defender grenade can wipe your entire breaching party.
-
Step 3: Synchronization — Set a clear countdown and coordinate your explosive placement. The RPG rocket and C4 charges have different travel times, so account for that in your timing.
-
Step 4: Entry and Clear — The moment the breach opens, the first wave enters while the demolition team repositions to cover the flanks. Smoke grenades can obscure defender sightlines during this critical window.
-
Step 5: Consolidation — Once inside, secure the room and establish a foothold. This is where your WARDOGS building strategy shifts from offense to defense, as you fortify the captured position against counter-attacks.
The distraction breach is another effective pattern, where one squad member creates noise on the opposite side of the structure while the main breaching team works on the real entry point. This works because defenders naturally rotate toward the sound of combat, leaving the actual breach point understaffed. Players report that this tactic works especially well in the Hot Zone, where double cash rewards make the extra coordination worthwhile.
Countering Defensive Structures and Fortifications
Understanding how to destroy structures is only half the WARDOGS demolition guide equation — you also need to know what you're up against. Defensive structures in WARDOGS range from simple sandbag walls to elaborate forward operating bases with multiple layers of protection. The official WARDOGS website highlights that fortifying chokepoints with forward operating bases is a core strategy, which means your breaching tools need to account for layered defenses.
The most common defensive setup involves an outer ring of sandbags, a middle layer of reinforced wood, and an inner core of metal plating protecting key assets. Each layer requires different tools and time investments to crack. Sandbags fall to frag grenades and small arms fire, reinforced wood needs RPG rockets or C4, and metal plating demands sustained explosive pressure or multiple coordinated strikes.
Defensive Structure Weakness Table
| Structure Type | Health Pool | Weakness | Recommended Tool | Time to Breach |
|---|---|---|---|---|
| Sandbag Wall | 300 | Frag grenades | Frag Grenade | 2-3 seconds |
| Reinforced Wood | 500 | Explosive damage | RPG Rocket | 3-5 seconds |
| Metal Plating | 800 | Sustained explosives | C4 Charges | 5-8 seconds |
| Concrete Barrier | 1,000 | Mortar strikes | Mortar Strike | 10-15 seconds |
| Full FOB Complex | 3,000+ | Coordinated assault | Multiple tools | 30+ seconds |
The concrete barrier and full FOB complex represent the upper echelon of defensive structures, and they require serious commitment to crack. Community testing suggests that a single mortar strike can significantly weaken a concrete barrier, but destroying a full FOB demands coordinated use of multiple explosive types across several minutes. This is where the WARDOGS building strategy of layered defenses really shines — each layer forces attackers to expend resources and time, giving defenders opportunities to rotate and counter-attack.
If you're looking to understand the defensive side of this equation, our WARDOGS base defence guide covers how to build and maintain these structures effectively. Understanding both sides of the conflict makes you a more effective breacher, since you'll know exactly where defenders are likely to place their fortifications and how to exploit those patterns.
Advanced Demolition Techniques and Positioning
Once you've mastered the basics of this WARDOGS demolition guide, it's time to explore advanced techniques that separate good breachers from great ones. These tactics require more practice and coordination, but they dramatically increase your effectiveness in WARDOGS siege warfare scenarios.
The multi-charge sync technique involves placing multiple C4 charges on different structural points and detonating them simultaneously. This creates a catastrophic failure in the structure, often collapsing entire wall sections rather than just breaching a single point. The key is timing — all charges must detonate within a fraction of a second of each other to achieve the structural collapse effect. Players report that this technique is especially effective against metal plating, which normally resists single explosive strikes.
Positioning Principles for Demolition
-
Elevation advantage — Firing rockets from elevated positions increases their effective range and makes you harder to hit. Look for rooftops, hills, or vehicle-mounted platforms.
-
Angle of attack — Hitting walls at oblique angles can cause splash damage to defenders behind the structure. This is particularly effective when combined with frag grenades.
-
Cover discipline — Never stand in the open while reloading or placing charges. Use the environment and your squadmates' suppression fire to maintain safety.
-
Fallback planning — Always have an escape route planned before you commit to a breach. If the assault fails, you need to extract with your remaining cash and equipment.
The vehicle-assisted breach is another advanced technique, where you use the game's vehicle mechanics to deliver demolition teams or explosives directly to the target. The WARDOGS Steam page mentions that vehicles are part of the core loadout system, and community reports suggest that helicopter insertions of demolition teams can catch defenders completely off guard. This approach requires significant coordination and cash investment, but the payoff in terms of surprise and speed is substantial.
For a deeper dive into the construction side of the game, our WARDOGS buildable structures guide explains the full range of defensive options available to builders. Understanding what defenders can create helps you plan your breaching approach more effectively, since you'll know which structures are worth targeting and which can be bypassed entirely.
Common Breaching Mistakes and How to Avoid Them
Even experienced players make mistakes when executing this WARDOGS demolition guide's principles. Recognizing these errors — and knowing how to correct them — can save your squad from costly failures in WARDOGS siege warfare engagements.
The most common mistake is over-committing to a single breach point. Players who focus all their explosive resources on one wall segment create a predictable pattern that defenders can easily counter. Instead, maintain flexibility by keeping some explosives in reserve for secondary breaches or defensive emergencies. This aligns with the broader WARDOGS building strategy of adaptability — the best breachers are also the best improvisers.
Critical Mistakes Table
| Mistake | Consequence | Correction |
|---|---|---|
| Breaching without reconnaissance | Wasted explosives on reinforced walls | Scout the structure first |
| Clustering during approach | Squad wiped by single grenade | Maintain spacing |
| Ignoring flank security | Counter-attack from unexpected angle | Assign flank watchers |
| Exhausting all explosives | No tools for counter-breach | Reserve 1-2 charges |
| Poor timing with squad | Breach opens before support arrives | Synchronize with countdown |
The timing error is perhaps the most frustrating mistake because it wastes the entire team's effort. When a breach opens but the assault squad isn't ready to enter, defenders have precious seconds to reposition and seal the gap. This is why communication through proximity voice chat is so essential — everyone needs to know exactly when the explosives will detonate and what their role is in the immediate aftermath.
Another critical error is ignoring the economic dimension of demolition. Every rocket, grenade, and C4 charge costs real cash that persists across matches. Players who burn through their entire war fund on explosives without earning it back through teamplay actions find themselves unable to afford proper loadouts in subsequent engagements. The game's design, as highlighted by PCGamesN's coverage, rewards selfish teamwork — so make sure your breaching activities also generate income through objective control and squad support.
Frequently Asked Questions
What is the best explosive for breaching buildings in WARDOGS?
The RPG rocket is the most versatile breaching tool because it offers strong structural damage, good range, and reasonable cost at $1,200. It handles most defensive structures effectively, from sandbags to reinforced wood. For metal plating, you'll want C4 charges or a coordinated mortar strike instead.
How do I earn back the cash I spend on explosives?
Teamplay actions are the key to maintaining your war fund. Reviving squadmates, transporting teammates, controlling objectives, and operating in the Hot Zone all generate income. The Hot Zone pays double, so prioritizing demolition work near active objectives helps offset your explosive expenses significantly.
Can I breach a forward operating base solo?
Technically yes, but it's not recommended. A full FOB complex has over 3,000 health and requires multiple explosive types to crack. Solo breachers run out of ammunition and become vulnerable to defender counter-attacks. Coordinating with at least two other demolition specialists dramatically increases your success rate.
What defensive structures are hardest to breach?
Metal plating and concrete barriers present the biggest challenges. Metal plating resists single explosive strikes and requires sustained pressure, while concrete barriers need mortar strikes or coordinated multi-charge attacks. Full FOB complexes combine multiple layers, making them the most time-consuming and resource-intensive targets.
Should I prioritize demolition or regular combat in my loadout?
Prioritize demolition only if your squad lacks breaching capability; otherwise, run one explosive tool with standard weapons. A balanced loadout lets you earn cash from teamplay actions like reviving while still contributing to structural damage. Start with the standoff breacher to learn breaching basics before experimenting with advanced techniques.