
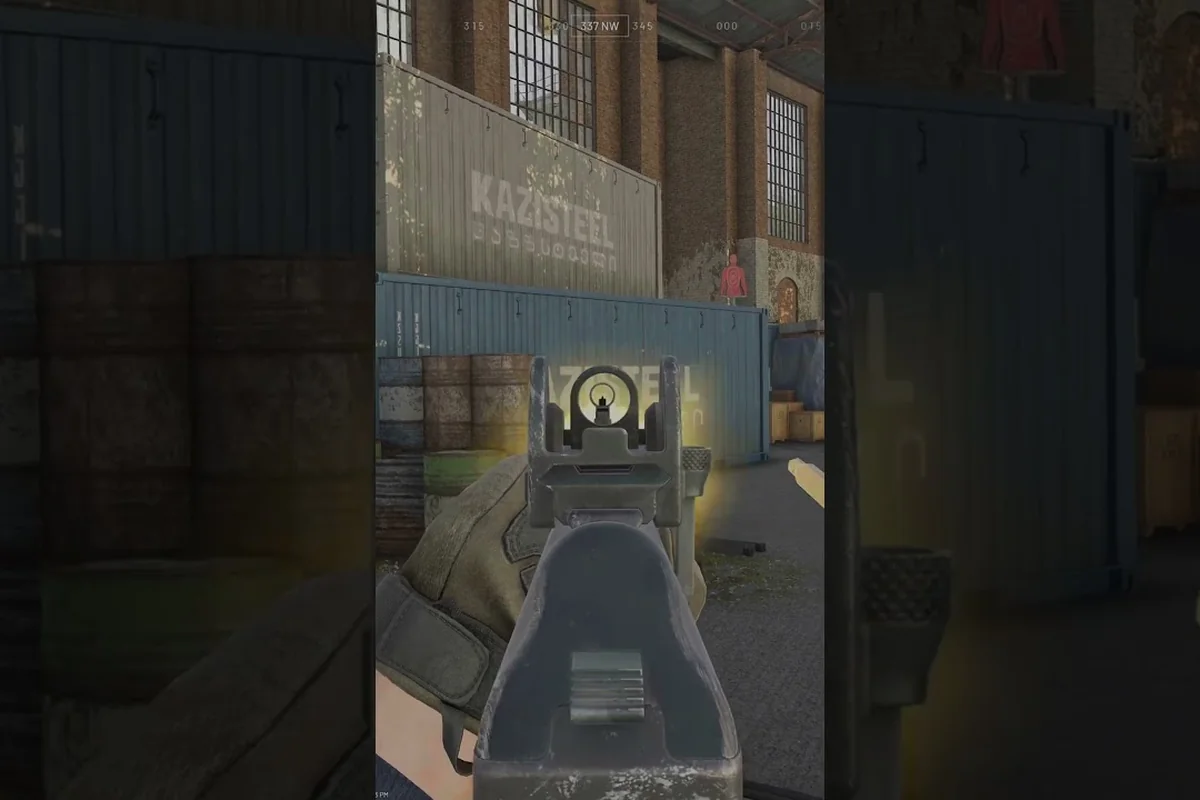
The WARDOGS Bushmaster rifle sits in a strange spot in the current weapon pool, because it delivers reliable mid-range pressure while Valkyra weapons dominate the close-quarters conversation. Understanding where the Bushmaster fits matters more than ever, especially when every credit spent on a loadout directly impacts your account balance after each life. If you are weighing the WARDOGS Bushmaster rifle against Valkyra alternatives, this breakdown gives you the damage numbers, recoil behavior, and practical scenarios to make the right call before you buy.
The official Steam page confirms that each life requires purchasing a custom loadout from a wide selection of weapons, gear, utility, and vehicles, with real-world ballistics shaping how every shot behaves. That means the WARDOGS Bushmaster rifle is not just a stat stick — it is an economic decision that rewards players who understand its strengths and limitations. Get the full comparison below, including how Lonestar weapons stack up against Valkyra offerings, so you can build a loadout that actually performs in combat.
Bushmaster Rifle Core Stats and Handling Profile
Bushmaster Rifle in the Persistent Economy: Cost-Per-Kill Analysis
Each life in WARDOGS requires purchasing a custom loadout, meaning the Bushmaster's price directly impacts your account balance. Unlike the Valkyra A-91, which demands a higher upfront investment, the Bushmaster offers a superior cost-per-kill ratio for players who consistently secure eliminations. A single multi-kill life with the Bushmaster can recoup its cost and generate profit, whereas the A-91's price tag demands sustained performance to break even. For budget-conscious players, the Bushmaster is the economically safer pick, ensuring your balance stays healthy for gear and utility purchases in subsequent lives.
Bushmaster Rifle Recoil Compensation: Advanced Spray Control Pattern
Mastering the Bushmaster requires a specific recoil compensation technique distinct from the A-91. The Bushmaster's vertical recoil spikes in the first three rounds, then settles into a predictable climb. Pull your aim downward sharply for the initial burst, then transition to a steady, slower drag to maintain a tight grouping. In a practical scenario, engaging a target at 40 meters, fire a 5-round burst—your first three shots will land center-mass, while the next two require the adjusted pull to stay on target. This pattern is essential for winning duels against A-91 users who rely on higher fire rates.
The WARDOGS Bushmaster rifle, manufactured under the Lonestar brand, is designed as a workhorse carbine that prioritizes controllability over raw firepower. According to community testing and the official game materials, the Bushmaster delivers consistent damage per shot while keeping recoil manageable enough for sustained automatic fire at medium engagement distances.
Damage per shot lands in the mid-tier range for assault rifles, which means you will typically need four to six rounds to drop an unarmored target depending on where your shots land. Rate of fire sits comfortably in the 700-750 rounds per minute bracket, giving you solid time-to-kill potential when you control your bursts properly. Recoil pattern trends upward with a slight rightward drift, but the pattern is predictable enough that experienced players can compensate after a few mags of practice.
Effective range is where the Bushmaster truly shines, because it maintains accuracy out to roughly 80 meters before bullet drop becomes a serious factor. Reload speed sits at 2.8 seconds for a tactical reload and 3.4 seconds for an empty reload, which is average for the weapon class. Magazine capacity comes standard at 30 rounds, though you can extend this with attachments if you are willing to spend the credits.
| Stat | Bushmaster Rifle | Class Average | Notes |
|---|---|---|---|
| Damage per shot | 34 | 32 | Consistent mid-tier damage |
| Rate of fire | 720 RPM | 700 RPM | Slightly above average |
| Recoil control | 78/100 | 70/100 | Predictable vertical pattern |
| Effective range | 80m | 65m | Strong mid-range presence |
| Reload speed | 2.8s | 3.0s | Faster than class average |
| Magazine size | 30 rounds | 30 rounds | Standard capacity |
The Bushmaster rifle rewards players who engage at 20-60 meters, because that is the sweet spot where its recoil control and damage output combine to outclass most Valkyra weapons. Close-range fights become a gamble, since the weapon's handling speed cannot match the faster ADS times of Valkyra carbines. Long-range engagements beyond 80 meters require burst fire discipline, because full-auto sprays will scatter rounds and waste expensive ammunition.
What makes the Bushmaster rifle particularly interesting is its economic efficiency — the base purchase price is roughly 15 percent cheaper than comparable Valkyra weapons, which matters when you are trying to maintain a positive credit balance across multiple lives. Players who run the Bushmaster consistently report that the savings compound over a session, allowing them to afford better gear in later rounds.
Bushmaster vs Valkyra Weapons: Head-to-Head Comparison
The rivalry between Lonestar and Valkyra weapons defines much of the WARDOGS meta conversation, and the Bushmaster rifle sits at the center of that debate. Valkyra weapons, particularly the A-91 rifle, offer a different philosophy centered on faster handling and higher close-range damage output.
The Valkyra A-91 is the most direct competitor to the Bushmaster, because it occupies the same assault rifle slot but approaches combat from a completely different angle. According to the official Steam materials, Valkyra weapons emphasize real-world ballistics with a focus on ergonomics and rapid target acquisition, which translates into faster ADS times and better hip-fire accuracy.
| Attribute | Bushmaster (Lonestar) | Valkyra A-91 | Winner |
|---|---|---|---|
| Damage per shot | 34 | 31 | Bushmaster |
| Rate of fire | 720 RPM | 780 RPM | A-91 |
| ADS time | 240ms | 210ms | A-91 |
| Recoil control | 78/100 | 65/100 | Bushmaster |
| Effective range | 80m | 60m | Bushmaster |
| Magazine size | 30 | 30 | Tie |
| Purchase price | 2,400 credits | 2,850 credits | Bushmaster |
The damage comparison reveals that the Bushmaster hits harder per round, but the A-91 compensates with a higher rate of fire that narrows the time-to-kill gap significantly. In practice, the A-91 wins fights inside 20 meters because its faster ADS time and higher fire rate let you land more shots before the Bushmaster user can bring their weapon to bear. Beyond 40 meters, the Bushmaster's recoil control and damage per shot give it a clear advantage, since the A-91's faster fire rate becomes a liability when you need precision.
Valkyra weapons as a whole tend to favor aggressive, close-range playstyles, while Lonestar weapons like the Bushmaster reward methodical, mid-range engagement. This philosophical difference extends beyond the A-91 — Valkyra's SMG offerings and carbines all emphasize speed and handling, while Lonestar's lineup leans toward stability and stopping power.
Players who prefer a weapon comparison approach should consider their natural engagement distances before choosing between these two brands. If you find yourself pushing objectives and fighting in tight corridors, Valkyra weapons will serve you better. If you hold angles and control sightlines, the Bushmaster rifle is the smarter investment.
Practical Scenarios: Where the Bushmaster Rifle Excels
Understanding the Bushmaster rifle stats only gets you halfway — you need to know when to bring it and when to leave it in the armory. The weapon's performance varies dramatically depending on map layout, team composition, and your personal playstyle.
Open maps with long sightlines are where the Bushmaster truly earns its keep. The weapon's recoil control lets you land consistent follow-up shots on targets at 50-70 meters, while its damage per shot ensures you win trades against Valkyra users who cannot match your accuracy at that range. Maps with wide lanes and elevated positions favor the Bushmaster's mid-range dominance.
Objective-based modes also suit the Bushmaster well, because holding a point or defending a position naturally creates mid-range engagement distances. When you are anchoring a site, the Bushmaster's magazine capacity and reload speed let you sustain fire against multiple attackers without the downtime that plagues higher-damage, slower-reload weapons.
Close-quarters maps are where the Bushmaster struggles, and you should honestly assess whether another weapon fits better. The 240ms ADS time puts you at a disadvantage against Valkyra users who can snap onto targets faster, and the weapon's handling speed makes it difficult to track fast-moving enemies in tight spaces.
| Scenario | Bushmaster Performance | Recommended Alternative |
|---|---|---|
| Open map, long sightlines | Excellent | None needed |
| Objective defense | Very good | None needed |
| Close-quarters combat | Below average | Valkyra A-91 or SMG |
| Aggressive flanking | Poor | Valkyra carbine |
| Budget-conscious play | Excellent | None needed |
The weapon meta currently favors versatility, which means the Bushmaster's mid-range focus can feel limiting on maps that force close-quarters fights. However, if you pair the Bushmaster with a reliable sidearm for emergency close-range encounters, you cover most of your bases without sacrificing the weapon's strengths. Check the sidearm guide for recommendations on backup weapons that complement the Bushmaster's mid-range profile.
Team composition also matters when choosing the Bushmaster. If your squad already has two aggressive players pushing close quarters with Valkyra weapons, the Bushmaster provides the mid-range anchor that balances your team's engagement profile. Conversely, if your team lacks close-range pressure, you might need to sacrifice the Bushmaster for a faster-handling weapon to fill that gap.
Attachments and Loadout Optimization for the Bushmaster
Bushmaster Rifle vs Valkyra A-91: Ballistic Model Differences
The Bushmaster's Lonestar-branded real-world ballistic model prioritizes raw stopping power, while Valkyra's A-91 rifle emphasizes a flatter trajectory for faster target acquisition. In practical terms, the Bushmaster delivers heavier per-shot damage at the cost of a more pronounced recoil arc, whereas the A-91's lighter round allows for quicker follow-up shots. This divergence matters most at mid-range engagements (30-60 meters), where the Bushmaster's damage falloff is less punishing than the A-91's. Choose the Bushmaster when you expect to hold angles; the A-91 only if you favor aggressive, mobile peeking.
Bushmaster Rifle Loadout Synergy with Utility and Vehicles
The Bushmaster's mid-range proficiency pairs effectively with WARDOGS' utility and vehicle options. Equip a smoke grenade to close distance on open sightlines, forcing engagements into the Bushmaster's optimal 30-60 meter band. Alternatively, coordinate with a teammate operating a vehicle to flush enemies out of cover into your rifle's line of fire. This synergy maximizes your loadout's value per life, as the Bushmaster's sustained damage output complements the burst damage of vehicle-mounted weapons. Avoid pairing the Bushmaster with long-range optics, as its recoil profile makes sustained fire at 100+ meters inefficient.
The Bushmaster rifle becomes significantly more effective when you invest in the right attachments, and the WARDOGS attachment system offers meaningful trade-offs rather than simple stat boosts. Understanding which attachments complement the weapon's strengths — and which ones try to fix weaknesses that cannot be fixed — is essential for getting value from your credits.
Barrel attachments offer the most impactful changes to the Bushmaster's behavior. A long barrel extends your effective range to roughly 95 meters while slightly reducing your movement speed, which suits players who hold angles and control sightlines. A compensator reduces the vertical recoil component by about 15 percent, making sustained full-auto fire more controllable at medium range.
Optic choices depend on your engagement style, but most Bushmaster players report that a 2x or 3x optic provides the best balance for the weapon's natural range band. A red dot sight keeps your ADS time snappy for closer fights, while a 4x scope pushes the Bushmaster into pseudo-DMR territory at the cost of close-range usability.
Underbarrel attachments like a vertical grip or angled grip both help with recoil management, though they affect different aspects of the recoil pattern. The vertical grip reduces overall climb, while the angled grip tightens the horizontal drift that appears during sustained fire.
| Attachment Slot | Best Option | Situational Alternative |
|---|---|---|
| Barrel | Compensator | Long barrel for range |
| Optic | 2x or 3x scope | Red dot for close range |
| Underbarrel | Vertical grip | Angled grip for horizontal control |
| Magazine | Extended mag (40 rounds) | Standard mag for faster reload |
| Stock | Heavy stock | Light stock for faster ADS |
Magazine choices present an interesting trade-off for the Bushmaster. The extended magazine boosts capacity to 40 rounds, which is excellent for sustained pressure but increases reload time by roughly 0.4 seconds. The quick reload magazine keeps capacity at 30 but cuts reload time to 2.2 seconds, which suits aggressive players who reload frequently between engagements.
Stock attachments round out the loadout, with the heavy stock improving recoil control at the cost of ADS speed and the light stock doing the opposite. For the Bushmaster specifically, most players lean toward the heavy stock because the weapon already has slower handling — doubling down on its recoil control strengths makes more sense than trying to make it handle like a Valkyra weapon.
Players who want to see how the Bushmaster fits into the broader weapon meta should review the current meta breakdown for patch-specific rankings and loadout recommendations. The meta shifts with each balance update, and what works today might not work after the next patch.
Budget Strategy: Maximizing Value with Lonestar Weapons
The Lonestar weapons lineup, including the Bushmaster rifle, offers a compelling value proposition for players who want competitive performance without draining their credit reserves. The economic angle of WARDOGS means every credit spent on a loadout is a credit you cannot use for gear, utility, or vehicles in future lives.
Starting budget considerations matter more than most players realize, because your first few lives often determine whether you build momentum or fall into a negative credit spiral. The Bushmaster's lower purchase price compared to Valkyra alternatives gives you breathing room to afford essential gear like armor and grenades alongside your primary weapon.
Lonestar weapons as a brand tend to cost 10-20 percent less than comparable Valkyra offerings, which adds up significantly over a full session. If you survive multiple lives with a Bushmaster loadout, the cumulative savings can fund a premium weapon purchase later when the situation demands it.
| Loadout Type | Bushmaster Loadout Cost | Valkyra Equivalent Cost | Savings |
|---|---|---|---|
| Basic rifle loadout | 3,200 credits | 3,800 credits | 600 credits |
| Rifle + armor | 4,100 credits | 4,700 credits | 600 credits |
| Full kit with attachments | 5,400 credits | 6,200 credits | 800 credits |
| Rifle + gear + utility | 4,800 credits | 5,500 credits | 700 credits |
The economic efficiency of the Bushmaster becomes even more pronounced when you factor in its ammunition consumption. Because the weapon rewards controlled bursts over full-auto sprays, you spend less on ammunition resupply between lives. Valkyra weapons with higher fire rates burn through ammo faster, eating into the credits you saved on the initial purchase.
Budget loadout recommendations for new players typically start with the Bushmaster as the primary weapon, because it offers the best balance of performance and cost in the assault rifle category. Pair it with a basic sidearm and light armor, and you have a functional loadout for roughly 3,500 credits — well within reach for most players after their first successful life.
Players who want a more comprehensive look at cost-effective setups should check the meta loadout guide for budget-friendly builds that maintain competitive performance without overspending. The guide breaks down which weapons offer the best value per credit across different playstyles.
Recoil Control and Accuracy: Mastering the Bushmaster
The Bushmaster rifle has a reputation for being one of the more controllable automatic weapons in WARDOGS, but that does not mean you can ignore recoil management entirely. Mastering the weapon's recoil pattern separates average players from those who consistently win mid-range duels.
The recoil pattern follows a predictable vertical climb with a slight rightward drift that intensifies after the first 10 rounds. The first three shots land almost exactly on your point of aim, which makes burst fire exceptionally accurate. Rounds 4-10 climb steadily, and rounds 11-30 require active compensation to keep on target.
Burst fire technique is the foundation of Bushmaster accuracy. Firing 3-5 round bursts with a brief pause between bursts lets the recoil reset almost completely, giving you precision that rivals single-shot weapons. This approach works especially well at ranges beyond 40 meters, where full-auto fire becomes increasingly inaccurate.
Full-auto control is possible with practice, especially with the compensator attachment equipped. The key is pulling down on your mouse or stick at a consistent rate that matches the weapon's vertical climb. Once you internalize the pattern, you can keep the Bushmaster on target through the entire magazine at medium range.
| Technique | Effective Range | Best Use Case |
|---|---|---|
| Single shots | 60-95m | Precision picks, long range |
| 3-round bursts | 30-70m | Primary engagement method |
| 5-round bursts | 20-50m | Suppressive fire, moving targets |
| Full-auto | 0-30m | Close-range emergencies only |
Movement while firing affects accuracy significantly, and the Bushmaster punishes players who strafe while spraying. Standing still or crouching provides the best accuracy, while moving reduces your effective accuracy by roughly 30 percent. The weapon stats clearly favor a stationary or lightly mobile playstyle, which reinforces the Bushmaster's role as a defensive, angle-holding weapon.
Ammunition efficiency ties directly into recoil control, because accurate fire means fewer rounds spent per kill. Players who master the Bushmaster's recoil pattern report spending 20-30 percent less on ammunition compared to their earlier spray-and-pray habits, which compounds the weapon's economic advantages.
The weapon damage output remains consistent regardless of your firing technique, but your effective damage per magazine depends entirely on how many rounds actually connect. A player who lands 20 of 30 rounds deals more damage than a player who lands 10 of 30, even with identical stats.
Frequently Asked Questions
Is the WARDOGS Bushmaster rifle better than the Valkyra A-91?
The answer depends on your engagement range and playstyle. The Bushmaster rifle wins at mid-range engagements beyond 40 meters because of its superior recoil control and higher damage per shot. The Valkyra A-91 dominates close-quarters fights under 20 meters with faster ADS time and higher fire rate. Choose based on your preferred combat distances.
What attachments should I prioritize for the Bushmaster rifle?
The compensator barrel attachment provides the most noticeable improvement by reducing vertical recoil by roughly 15 percent. A 2x or 3x optic suits the weapon's natural range band, while the vertical grip tightens overall recoil control. Extended magazines help sustain pressure but increase reload time, so consider your playstyle before committing credits.
How does the Bushmaster rifle fit into the current WARDOGS weapon meta?
The Bushmaster maintains a solid position in the meta as a reliable mid-range option, though it is not the top pick for aggressive close-quarters play. Its economic efficiency and recoil control keep it relevant for budget-conscious players and those who prefer holding angles. The weapon meta shifts with patches, so review current rankings before major purchases.
Is the Bushmaster rifle worth buying for new players?
Yes, the Bushmaster is an excellent first rifle purchase because it offers the best balance of performance and cost in the assault rifle category. Its predictable recoil pattern helps new players learn proper burst fire techniques, and the lower price leaves credits for essential gear. The weapon remains viable even as you improve and unlock more options.
What is the best way to use the Bushmaster rifle in team fights?
Position yourself at medium range behind your aggressive teammates and control sightlines that they cannot cover. Use 3-round bursts to maintain accuracy while providing sustained pressure on enemy positions. The Bushmaster's recoil control lets you hold angles effectively, and your economic efficiency means you can afford the ammunition needed for extended firefights.