
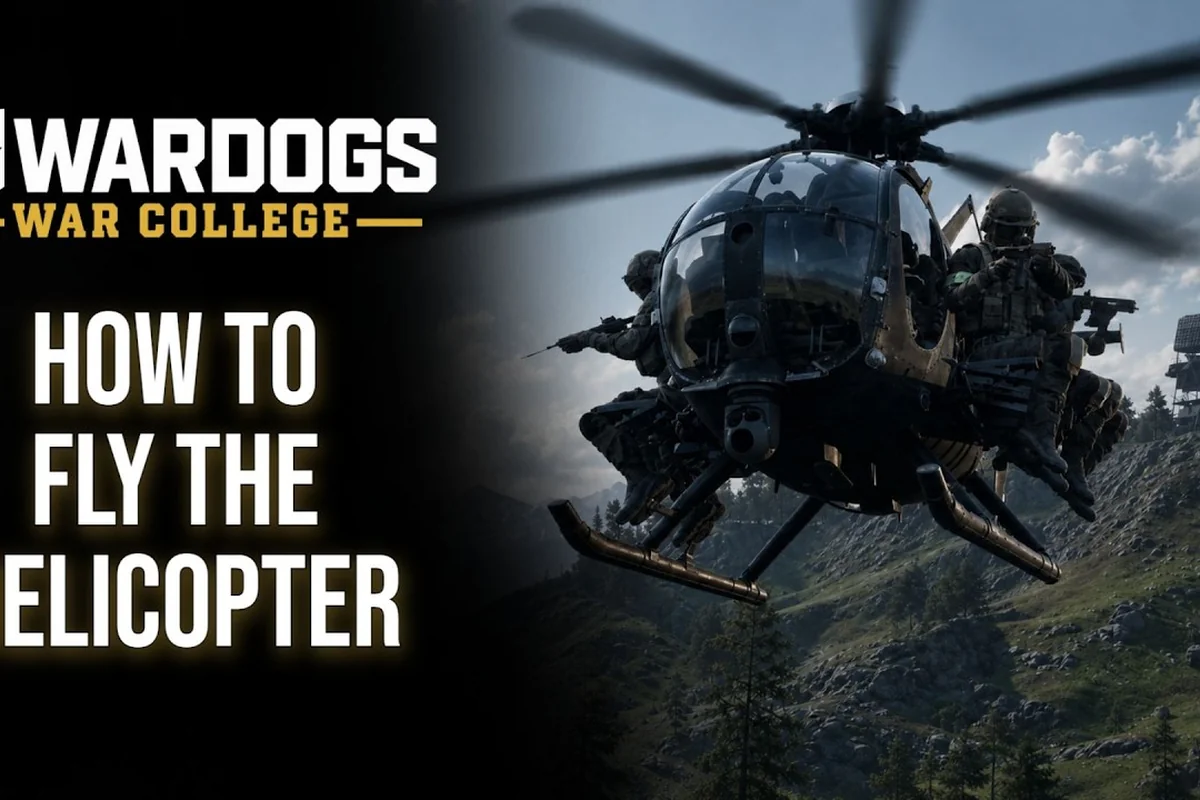
The WARDOGS transport helicopter is the fastest way to shift the momentum of a 100-player match, yet most players treat it as a glorified taxi and waste its real potential. When you pair helicopter logistics with tank and artillery support, you create a combined-arms loop that controls the Hot Zone and keeps your squad's cash flowing. This guide breaks down the WARDOGS transport helicopter flight model, tank driving fundamentals, and artillery positioning so you can turn vehicle combat into a reliable scoring engine.
Vehicle combat in WARDOGS is not about who has the biggest gun; it is about who spends their loadout cash smarter. According to the official WARDOGS Steam page, every player starts with $10,000 and purchases a custom loadout each life, which means every helicopter sortie or tank push has an opportunity cost. The players who win matches are the ones who treat vehicles as force multipliers rather than personal kill machines, and that mindset starts with understanding how each vehicle type fits into the larger objective game.
WARDOGS Transport Helicopter Flight Model and Loadout Economics
The WARDOGS transport helicopter is built around a real-world flight model that punishes aggressive maneuvers and rewards smooth, deliberate control inputs. Unlike arcade shooters where you can yank the stick and expect instant response, this helicopter demands you manage collective, cyclic, and momentum through every phase of flight. Community reports from the closed beta indicate that players who practiced hover control for even thirty minutes saw dramatically fewer crashes during hot extractions, which makes flight training the highest-return investment you can make with your playtime.
The helicopter's primary role is supply and troop transport, and the cash economy reinforces this design. Ferrying squadmates to the Hot Zone pays you directly, and the Hot Zone multiplier doubles that income, which means a single well-executed insertion run can fund your next tank loadout. The WARDOGS vehicle loadout guide explains how to balance these earnings against your spending, but the core principle is simple: the helicopter is the only vehicle that generates cash while simultaneously delivering combat power to the objective.
| Flight Maneuver | Difficulty | Best Use Case | Common Mistake |
|---|---|---|---|
| Hover Hold | Easy | Landing zone security, supply drops | Overcorrecting with cyclic inputs |
| Nap-of-Earth Flight | Medium | Avoiding AA fire, covert insertions | Flying too high over open ground |
| Quick Descent | Hard | Hot extraction under fire | Dumping collective too fast |
| Auto-Rotation Landing | Advanced | Engine failure survival | Panicking and losing rotor RPM |
The rotor RPM management system is the single most important mechanic to master because it determines whether you can recover from a bad approach. When you enter a landing zone hot, you want to bleed off speed with a slight flare while keeping the rotor RPM in the green zone, then transition to a hover just above touchdown height. Players who skip this technique end up bouncing off the ground and damaging the skids, which costs repair cash and leaves your squad stranded in the open.
Helicopter Positioning for Supply Drops and Extraction
Positioning the WARDOGS transport helicopter is about reading the battlefield flow rather than just following your squad's marker. The best pilots identify two or three potential landing zones before they even pick up passengers, because the Hot Zone rotates and the safest approach can become a kill zone within seconds. You want to approach with terrain masking whenever possible, using ridgelines and building clusters to break line of sight from enemy anti-vehicle positions.
The supply drop mechanic rewards pilots who think ahead about squad needs. Dropping a crate of ammunition or medical supplies to a pinned-down squad can turn a losing fight into a breakthrough, and the cash reward for a well-placed drop is substantial. Experienced pilots report that coordinating supply drops with the proximity chat system creates a massive tactical advantage, because you can call out the drop zone and have the squad move to cover before you even arrive.
WARDOGS Tank Guide: Driving Fundamentals and Armor Management
The tank in WARDOGS is a heavy investment that demands you understand armor angling, terrain exploitation, and the vehicle's distinct acceleration profile. Unlike the helicopter, the tank is not about speed; it is about presence and controlled aggression. When you spawn a tank, you are telling the enemy team that you intend to hold ground, and the psychological pressure alone can shift how they allocate their own anti-vehicle resources.
Driving a tank effectively starts with understanding its turning radius and acceleration curve. The tank takes several seconds to reach its modest top speed, and it turns like a ship, so you must plan your approach before you commit to a route. The most common mistake reported by players is driving the tank straight into a contested zone without checking for enemy rocket launcher positions, which turns a $10,000 investment into a smoking wreck in under ten seconds.
| Tank Maneuver | Speed Impact | Armor Vulnerability | Recommended Use |
|---|---|---|---|
| Frontal Push | Medium | Low (front armor) | Breaking through chokepoints |
| Flanking Drive | High | High (side armor) | Ambushing enemy positions |
| Hull-Down Position | Stationary | Very Low | Defending a control zone |
| Reverse Retreat | Slow | Medium (rear armor) | Disengaging from bad fights |
The hull-down technique is the most important defensive skill in any WARDOGS tank guide because it uses terrain to protect your weakest armor plates. When you position the tank so that only the turret is exposed over a ridge, enemy anti-vehicle fire hits your thickest frontal armor at an angle that often ricochets. This technique turns a single tank into an immovable object that can hold a control zone against multiple attackers, and it is the foundation of every successful defensive strategy.
Tank Positioning and Breakthrough Tactics
Tank positioning is fundamentally about controlling sightlines and forcing the enemy to react to your presence. When you hold a hull-down position overlooking a control zone, you deny the enemy team the ability to move freely across open ground, which funnels them into predictable routes that your infantry can ambush. The tank's main gun is not just a weapon; it is a zoning tool that shapes the entire battlefield.
The breakthrough tactic requires coordination with your squad because a tank pushing alone is a target, but a tank pushing behind infantry support is a battering ram. You want the infantry to clear the immediate anti-vehicle threats while the tank provides suppressing fire on enemy positions, then the tank moves forward to create a foothold. According to the Team17 WARDOGS page, tearing through towns in heavily armored tanks is a core fantasy, and executing it properly requires this combined-arms approach rather than solo heroics.
WARDOGS Artillery Guide: Indirect Fire and Target Acquisition
The WARDOGS artillery tank is the ultimate expression of firepower, but it demands a completely different skill set than direct-fire vehicles. Artillery is not about aiming at what you can see; it is about calculating trajectories, reading the minimap, and delivering destruction on coordinates that your squad provides. The artillery tank trades armor and mobility for raw explosive power, which means positioning and situational awareness become your primary survival tools.
Artillery positioning follows a simple rule: stay far enough from the fight that you are not a target, but close enough that your shells arrive within seconds of your squad's callouts. The minimum arming distance on artillery shells means you cannot engage targets at point-blank range, so you need to maintain a buffer zone between your position and the frontline. Players who ignore this rule find themselves overrun by fast-moving enemy squads that close the distance before the artillery can react.
| Artillery Tactic | Effective Range | Reload Time | Best Target Type |
|---|---|---|---|
| Counter-Battery Fire | Long | Slow | Enemy artillery positions |
| Hot Zone Bombardment | Medium | Medium | Clustered infantry on objectives |
| Chokepoint Denial | Medium | Medium | Enemy reinforcements |
| Structure Demolition | Long | Slow | Fortified buildings and FOBs |
The counter-battery role is where artillery players can have the most impact on a match. When you spot enemy artillery shells landing, you can trace their trajectory back to the source and deliver your own fire on that position. This creates a duel where the first player to fire and relocate wins, and mastering this dance is what separates average artillery crews from match-defining ones.
Artillery Positioning and Team Coordination
Artillery positioning is a team effort because you cannot spot your own targets effectively from a rear position. You rely on squadmates to mark targets, provide range estimates, and confirm kills, which means the artillery guide is as much about communication as it is about ballistics. The vehicle tactics guide covers convoy and coordination protocols, but the key principle is that artillery is only as effective as the information feeding it.
The fire-and-relocate doctrine is essential for artillery survival because counter-battery fire will find you if you stay in one spot too long. After every two or three salvos, you should move to a new position, even if it means a minute of travel time. Players who master this rhythm report survival rates that are three to four times higher than stationary artillery crews, which translates directly to more shells on target over the course of a match.
WARDOGS Vehicle Combat Tips: Combined Arms Coordination
The true power of vehicle combat in WARDOGS emerges when you combine helicopter, tank, and artillery into a single coordinated force. The helicopter provides mobility and supply, the tank provides direct fire and armor, and the artillery provides indirect destruction, and together they cover each other's weaknesses. The combined arms loop starts with the helicopter inserting a squad and a tank crew into a strategic position, then the artillery provides fire support while the tank holds the objective.
| Vehicle Role | Primary Strength | Primary Weakness | Best Partner |
|---|---|---|---|
| Transport Helicopter | Speed and supply | Fragile to AA | Tank (ground escort) |
| Main Battle Tank | Armor and direct fire | Slow and vulnerable to flanking | Artillery (fire support) |
| Artillery Tank | Indirect destruction | Poor close-range defense | Helicopter (spotting) |
| Infantry Squad | Versatility and numbers | No heavy firepower | All vehicles (coordination) |
The vehicle combat tips that matter most are about timing and communication rather than mechanical skill. You want to synchronize your vehicle pushes with the Hot Zone rotation so that your heavy assets arrive exactly when the objective becomes contested. The WARDOGS vehicle tactics guide provides a deeper breakdown of convoy operations, but the core principle is that vehicles should never operate in isolation.
Coordinating Helicopter and Tank Operations
The helicopter-tank combination is one of the most powerful duos in WARDOGS because it covers both mobility and firepower gaps. The helicopter can scout ahead, identify enemy anti-vehicle positions, and guide the tank around ambushes, while the tank provides ground support that keeps landing zones secure. This synergy requires constant communication, and the ping reduction guide explains how to optimize your network settings for the split-second callouts that make this coordination work.
The air-ground attack pattern is a devastating tactic when executed properly. The helicopter draws enemy attention by making a loud, visible approach while the tank moves into a hull-down position on a flank. When the enemy focuses on the helicopter, the tank opens fire from an unexpected angle, and the helicopter can then circle around for a second pass or extract the squad. This pattern is difficult to counter because it forces the enemy to split their attention between two threats that require different responses.
Advanced Mobility Tactics for Skilled Vehicle Crews
Once you master the fundamentals of each vehicle type, you can start developing advanced tactics that exploit the battlefield's dynamic nature. The vehicle economy becomes a strategic resource rather than a personal budget, and you start making decisions based on what your team needs rather than what you want to drive. Experienced players report that the most effective squads designate a vehicle commander who coordinates all vehicle movements and ensures that assets are deployed where they have the most impact.
The decoy vehicle tactic is a high-risk, high-reward play that can swing a match. A cheap vehicle, like a jeep or scout car, can be driven into a contested area to draw enemy anti-vehicle fire, revealing their positions and wasting their ammunition. While the enemy focuses on the decoy, your main tank and artillery can engage from safe positions, and the helicopter can insert infantry to capture the objective. This tactic requires discipline because the decoy driver is likely to die, but the information gained is often worth the sacrifice.
| Advanced Tactic | Skill Level | Risk Level | Match Impact |
|---|---|---|---|
| Decoy Vehicle | Intermediate | High | Medium |
| Artillery Counter-Battery | Advanced | Medium | High |
| Helicopter Supply Chain | Advanced | Medium | High |
| Tank-Infantry Combined Push | Intermediate | Medium | Very High |
The helicopter supply chain is an advanced logistics tactic where you maintain a continuous rotation of supply drops to a forward position, allowing your squad to sustain a siege indefinitely. This requires two or three pilots working in shifts, and it ties up significant resources, but it can break a defensive line that would otherwise hold. The artillery counter-battery game becomes more important as enemy crews get better, and the players who win these duels are the ones who relocate aggressively and use decoy fire to mask their true position.
Frequently Asked Questions
How do I fly the WARDOGS transport helicopter without crashing?
The key is smooth control inputs and rotor RPM management. Start by practicing hover holds in an open area, then progress to landing approaches. Always bleed off speed with a slight flare before touchdown, and avoid aggressive cyclic inputs that destabilize the rotor. Community reports suggest thirty minutes of practice dramatically reduces crash rates.
What is the best way to use the artillery tank?
Position yourself at medium range from the frontline with a clear line of sight to likely target areas. Use the fire-and-relocate doctrine, moving after every two or three salvos to avoid counter-battery fire. Coordinate with squadmates for target spotting, and prioritize Hot Zone bombardments and chokepoint denial over random shelling.
How do I drive a tank effectively in WARDOGS?
Master the hull-down technique by positioning the tank so only the turret is exposed over terrain, which protects your weaker armor plates. Plan your approach before committing to a route because the tank accelerates slowly and turns poorly. Always push with infantry support to clear anti-vehicle threats before advancing.
What is the best vehicle combination for controlling the Hot Zone?
The helicopter-tank-artillery combination is the most effective for Hot Zone control. The helicopter provides mobility and supply drops, the tank holds the objective with hull-down positioning, and the artillery delivers indirect fire on enemy reinforcements. Coordinate all three through proximity chat to maximize their combined impact.
How does vehicle combat affect my cash economy?
Vehicles are expensive loadout purchases, so every death costs you significant cash. The transport helicopter can generate income through supply drops and troop transport, especially in the Hot Zone where earnings double. Smart vehicle usage focuses on force multiplication rather than personal kills, which keeps your cash balance healthy across matches.