
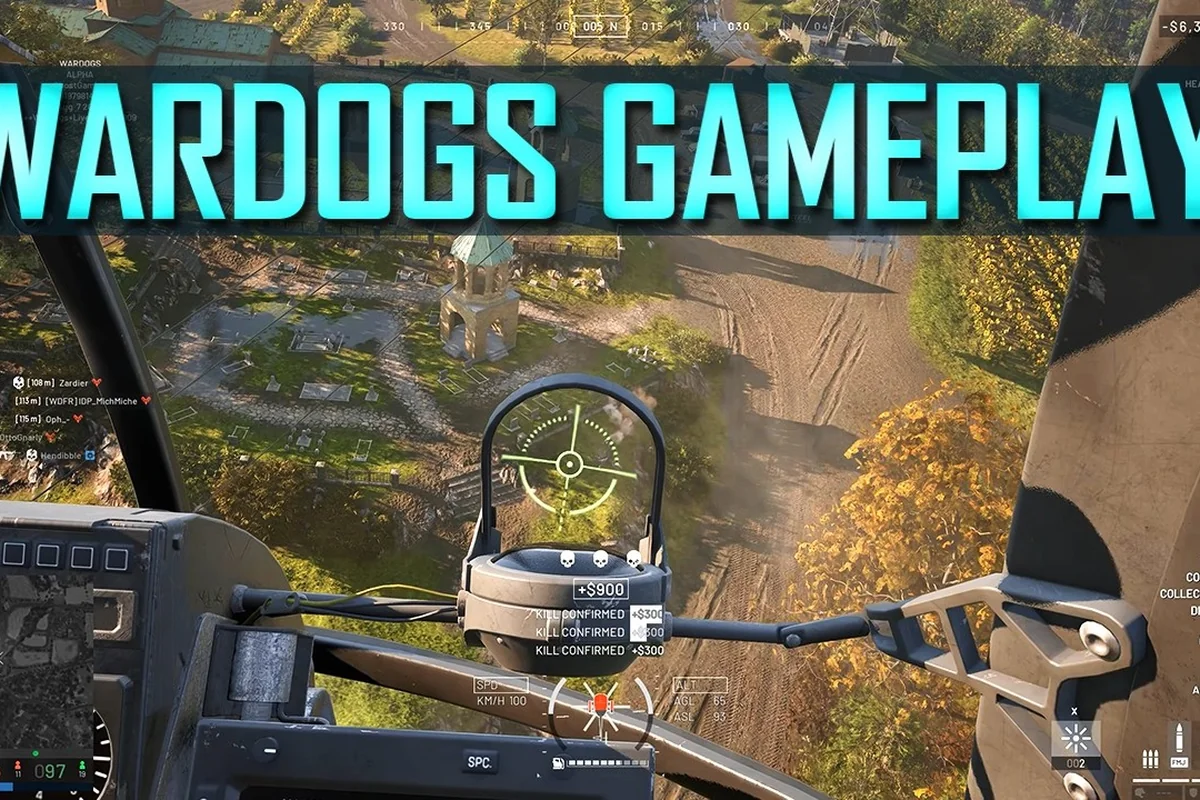
Winning in WARDOGS is rarely about raw aim — it's about understanding the WARDOGS map meta before the first shot fires. Because the 2x2km Control Zone spawns randomly inside a 256km² Eastern European battlefield, every match forces you to re-read terrain, predict spawn points, and find cover that actually protects you. This WARDOGS map meta guide breaks down spawn logic, terrain archetypes, and a practical cover guide so you can build a map control strategy that wins fights before they start.
Why the WARDOGS Map Meta Decides Matches Before Contact
The core loop of WARDOGS revolves around three teams fighting for a randomized Control Zone, and the team with the most players inside that zone earns points over time. According to the official Team17 game page, the randomized zone location plus individual tactics mean no two matches play the same. That randomness is exactly why the WARDOGS map meta matters: players who read the terrain quickly and rotate to the zone efficiently will always out-position teams that simply run toward the marker.
Understanding the map meta starts with three pillars:
-
Spawn logic — where your team enters the map and how that shapes your first rotation
-
Terrain archetypes — the industrial, mountain, and urban zones that dominate the 2x2km Control Zone
-
Cover density — which structures absorb fire, which ones collapse, and which ones you should never trust
The WARDOGS map spawns are not purely random in their effect: because the battlefield is destructible, the cover you memorize on one match may be rubble the next. The Steam store page confirms that players can destroy apartment blocks with rocket launchers, and the world reacts to player presence. That means the WARDOGS map terrain is a living system, not a static backdrop, and your map control strategy has to account for both the natural geography and the destruction players inflict on it.
Reading the 256km² Battlefield
The full map is vast, but you only ever fight inside the randomized 2x2km Control Zone. That zone rotates every match, which means the WARDOGS map meta rewards players who can quickly identify the dominant terrain type and adjust their loadout accordingly. A zone that sits on a mountain ridge demands different positioning than one that cuts through an industrial complex, and the best squads adapt their approach within the first minute of the match.
The Three-Team Dynamic
With three teams contesting the same zone, the map meta also includes a political layer: which team do you push, which team do you let fight each other, and which flank do you leave exposed because the third team is busy elsewhere. The randomized zone location amplifies this because the terrain often funnels two teams into early contact while the third approaches from a safer angle. Recognizing that pattern is the first step toward building a WARDOGS map control strategy that doesn't just react to the zone but shapes how the other two teams engage.
WARDOGS Map Spawns: How Entry Points Shape Your Rotation
The WARDOGS map spawns determine your opening options more than any other single factor. While the developers haven't published an official spawn diagram, community testing and player reports have identified consistent patterns in how teams enter the battlefield. Based on those reports, spawns generally fall into three categories that directly influence your first rotation.
| Spawn Type | Typical Location | Best Opening Move | Risk Level |
|---|---|---|---|
| Edge Spawn | Map boundary, far from zone | Vehicle rush to secure a chokepoint | Low |
| Mid-Range Spawn | Between boundary and zone | Infantry split to scout two approaches | Medium |
| Close Spawn | Near the Control Zone edge | Immediate fortification of zone perimeter | High |
The Edge Spawn is the most forgiving because you have time to coordinate before contact. Teams that spawn here should prioritize vehicle acquisition and a planned route into the zone, since the extra distance means you'll arrive after the first skirmishes but with better positioning. The Close Spawn is the most dangerous: you arrive early, but so do the other two teams, and the zone perimeter becomes a three-way crossfire within the first ninety seconds.
Spawn Timing and the Hot Zone Multiplier
Because the Hot Zone pays double cash, the WARDOGS map spawns that place you near the zone early create a real economic advantage. Players who capture the zone in the opening minutes earn more per second than those who arrive late, which compounds into better loadouts for the mid-game. The PCGamesN impressions piece notes that WARDOGS encourages teamplay through economic incentives, and the map spawns are part of that system: a good spawn rewards coordinated early aggression.
Vehicle Spawns and Rotation Speed
Vehicles change the spawn calculus entirely. A squad that spawns near a vehicle depot can cover ground that would take an infantry team several minutes, which means the WARDOGS map spawns interact with the vehicle economy in ways you need to plan around. If your team spawns far from the zone, the vehicle approach is almost mandatory; if you spawn close, spending cash on a vehicle might be wasteful when you could invest in fortifications instead. For a deeper breakdown of how vehicles fit into the broader battlefield, the vehicle warfare guide covers loadout costs and positioning tactics that pair well with specific spawn types.
WARDOGS Map Terrain: Breaking Down the Three Dominant Archetypes
The WARDOGS map terrain inside the Control Zone tends to fall into three archetypes, each with its own rules for movement, sightlines, and survivability. Learning to identify which archetype you're fighting in within the first thirty seconds is a core WARDOGS map meta skill because it tells you which weapons, vehicles, and building materials will pay off.
| Terrain Archetype | Key Features | Dominant Weapons | Building Priority |
|---|---|---|---|
| Industrial Complex | Warehouses, shipping containers, narrow lanes | SMGs, shotguns, rocket launchers | Sandbag chokepoints, wall reinforcement |
| Mountain Ridge | Elevation changes, exposed slopes, rock outcroppings | Sniper rifles, DMRs, LMGs | Defensive positions on high ground |
| Urban District | Apartment blocks, streets, vertical combat | Assault rifles, grenades, demolition | Building fortification, roof access control |
The Industrial Complex favors close-quarters combat because the shipping containers and warehouse walls create tight sightlines that punish long-range weapons. The Mountain Ridge is the opposite: open slopes and elevation changes mean the team that controls the high ground controls the engagement, and snipers become disproportionately valuable. The Urban District is the most complex because it combines vertical combat with destruction — apartment blocks offer multiple floors, but a single rocket launcher can collapse the building and eliminate your position entirely.
Industrial Complex Tactics
In the industrial archetype, the WARDOGS map terrain funnels players through narrow lanes between containers, which makes flanking predictable and ambushes deadly. Teams that control the central warehouse can dominate the zone because it offers sightlines into multiple approach routes while providing cover from most angles. The destruction system matters here: rocket launchers can level the warehouse walls, so the best squads build fallback positions rather than committing fully to one structure.
Mountain Ridge and Elevation Control
The mountain archetype rewards patience and positioning over aggression. Because the slopes expose movement, the team that secures the highest point with good cover can lock down the zone approach routes. However, the exposed terrain also means that vehicles become vulnerable targets, and a well-placed rocket can wipe an entire squad pushing up the slope. The WARDOGS map terrain here punishes overextension, so disciplined squads that hold their elevation advantage tend to win the zone.
Urban District and Vertical Combat
The urban archetype is the most dynamic because destruction reshapes the battlefield constantly. Apartment blocks offer multiple floors, roof access, and interior sightlines, but they also collapse under sustained rocket fire. The WARDOGS map meta in urban zones revolves around controlling the buildings that survive: teams that fortify a standing structure and cover the streets below can hold the zone against infantry pushes, but they remain vulnerable to demolition attacks. For a complete breakdown of the different maps and their rotation patterns, the WARDOGS map list guide covers the full roster and how zones rotate between matches.
WARDOGS Cover Guide: What Protects You and What Betrays You
The WARDOGS cover guide is essential because not all cover is created equal, and the destruction system means that what protects you one moment can kill you the next. Understanding the difference between reliable cover, temporary cover, and death traps is a core WARDOGS map control strategy element that separates experienced players from beginners.
| Cover Type | Durability | Best Use | Weakness |
|---|---|---|---|
| Concrete Barriers | High | Defensive anchor points | Vulnerable to sustained rocket fire |
| Sandbag Fortifications | Medium | Rapid field cover | Can be destroyed by explosives |
| Wooden Structures | Low | Temporary concealment | Collapses under small-arms fire |
| Vehicle Hulls | Medium | Mobile cover | Explodes when destroyed |
| Building Interiors | High | Long-term defensive positions | Collapse under demolition |
The Concrete Barriers are the most reliable cover in the game because they absorb significant damage and provide stable sightlines. The Sandbag Fortifications are the building system's bread and butter: they deploy quickly, offer decent protection, and can be repaired, but they won't survive a concentrated explosive assault. The Wooden Structures are the most dangerous because they create a false sense of security — they collapse under sustained fire and leave you exposed at the worst possible moment.
Building Cover That Survives
When you build fortifications, the WARDOGS cover guide recommends layering: sandbags in front, concrete barriers behind, and a fallback position that you can retreat to if the first line breaks. Because the battlefield is destructible, the best defensive positions are those that force the enemy to commit explosives to break through, which gives your team time to reposition. The building system rewards players who think in layers rather than single walls, and the contested zones guide covers chokepoint strategies that pair well with layered fortifications.
Natural Cover vs. Built Cover
Natural cover — rocks, terrain folds, and elevation changes — is often more reliable than built cover because it can't be destroyed. The mountain archetype offers the best natural cover because the rock outcroppings absorb fire that would shred sandbags. The urban archetype offers the least natural cover, which is why building fortifications becomes essential in city zones. The WARDOGS map terrain dictates which cover type you should prioritize, and the best squads adapt their building strategy to the zone they're fighting in.
Building a WARDOGS Map Control Strategy That Wins
A WARDOGS map control strategy combines everything above into a coherent plan: you read the spawn, identify the terrain, secure reliable cover, and then execute a rotation that puts your team in the strongest position. The best squads treat the map meta as a checklist they run through in the first minute of every match, and that discipline is what separates consistent winners from teams that rely on individual skill.
The First Minute Checklist
-
Identify the terrain archetype within the first ten seconds and call it out to your squad
-
Assess your spawn position and decide whether to push fast or rotate deliberately
-
Secure a defensive anchor — a building, ridge, or chokepoint that you can hold
-
Assign roles: scout, builder, medic, and vehicle operator based on the terrain
-
Establish a fallback route before you commit to the zone
The first minute is the most important part of any match because it sets the tempo for everything that follows. Teams that secure a defensive anchor early can build fortifications while the other two teams fight for the zone's center, then sweep in once the initial skirmish thins out the opposition. Teams that rush the zone without a plan often find themselves caught between two enemy squads with no cover and no escape route.
Adapting When the Zone Rotates
The zone doesn't stay static, and neither should your strategy. When the Control Zone shifts, the WARDOGS map meta demands that you re-evaluate the terrain and adjust your positioning accordingly. A team that held a mountain ridge for the first phase might need to abandon it entirely when the zone moves to an industrial complex, and the teams that transition fastest gain a significant advantage. The rotation between zones is where matches are won or lost, because the team that controls the tempo controls the battlefield.
Communication and the Map Meta
The map meta is a team skill, not an individual one, and communication is the glue that holds it together. Because WARDOGS features proximity chat, the teams that call out spawns, terrain changes, and enemy movements in real time consistently outperform teams that play silently. The proximity chat guide covers how to use voice communication effectively for objective control, and it pairs directly with the map control strategy outlined here — you can't execute a rotation plan if your squad isn't talking.
Meta Traps That Get Players Killed
-
Ignoring the terrain archetype and running the same loadout every match
-
Trusting wooden cover in a zone with heavy explosive usage
-
Overcommitting to a building that the enemy can demolish with one rocket
-
Failing to establish a fallback route before engaging
-
Rotating too slowly when the zone shifts to a new location
The most common mistake is treating every match the same. The WARDOGS map meta is dynamic by design, and the teams that adapt to the terrain, the spawn, and the destruction around them are the ones that consistently control the zone and win the match.
Frequently Asked Questions
How do WARDOGS map spawns affect my early game strategy?
Your spawn position determines whether you should push the zone immediately or rotate deliberately. Close spawns reward early aggression and zone capture, while edge spawns favor vehicle acquisition and planned approaches. Assess your spawn in the first ten seconds and adjust your squad's opening move accordingly to maximize your positioning advantage.
What is the best terrain type for defensive play?
The mountain ridge archetype offers the best defensive potential because natural rock cover can't be destroyed and elevation provides sightline control. Teams that secure the high ground with layered fortifications can lock down approach routes effectively. However, the exposed slopes make movement dangerous, so disciplined positioning is essential.
How does the destruction system change the WARDOGS cover guide?
Destruction means that no cover is permanent, so the best strategy is layering. Concrete barriers and sandbag fortifications work well together, but you should always have a fallback position. Buildings offer strong protection but can collapse under rocket fire, so avoid overcommitting to a single structure.
What is the most important element of WARDOGS map control strategy?
The first minute of the match is the most critical because it sets the tempo. Identify the terrain archetype, assess your spawn, secure a defensive anchor, and establish a fallback route before committing to the zone. Teams that execute this checklist consistently outperform teams that rely on individual skill alone.
How do I adapt when the Control Zone rotates to a new location?
When the Control Zone rotates, abandon your old defensive anchor immediately—mountain elevation becomes useless inside an industrial complex. Re-deploy toward the new 2x2km zone, prioritizing cover that matches the terrain archetype, and use the persistent cash economy to buy vehicles for faster rotations. Efficient transitions let you control tempo and deny enemy spawns.